As you explore the landscape of the cheapest SMS verification services, you may find yourself intrigued by the evolving trends and predictions shaping the future of this crucial industry. From the integration of virtual US mobile numbers to the impact of customization and personalization, there are compelling developments on the horizon that could revolutionize the way businesses approach SMS verification. Stay tuned to uncover how these trends are set to redefine the authentication process and meet the growing demands of a digitally-driven world.
Rising Demand for Affordable SMS Verification
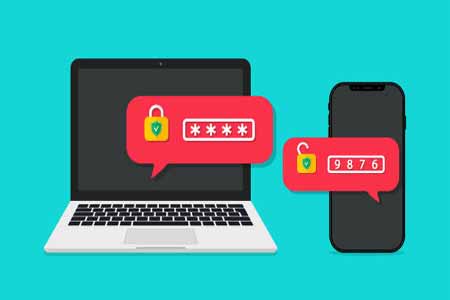
Businesses seeking cost-effective solutions are increasingly turning to affordable SMS verification services to meet their authentication needs. The demand for a cheap SMS verification service has surged due to its simplicity and effectiveness in securing online transactions and user accounts.
Companies across various industries are recognizing the importance of reliable authentication processes without breaking the bank. By opting for a cost-efficient SMS verification service, businesses can ensure secure access for their users while keeping operational expenses low.
The convenience and affordability of such services make them an attractive option for companies looking to enhance their security measures without compromising on quality. As the need for reliable authentication continues to grow, the popularity of cheap SMS verification services is expected to rise steadily in the coming years.
Impact of Advancements in Technology
With the rapid evolution of technology, the impact on the affordability and accessibility of SMS verification services is becoming increasingly significant. Advancements such as AI-powered verification systems, blockchain technology for secure transactions, and cloud-based services have revolutionized the efficiency and cost-effectiveness of SMS verification services.
These technological innovations have streamlined the verification process, making it quicker and more reliable for businesses and consumers alike. Additionally, advancements in mobile networks and smartphone capabilities have enhanced the delivery speed and reliability of SMS codes, ensuring a seamless verification experience.
As technology continues to progress, we can expect further enhancements in SMS verification services, offering even more convenience and security to users.
Changing Consumer Preferences
Amidst the evolving landscape of SMS verification services, consumers are increasingly influencing the direction of industry trends through their changing preferences.
When it comes to choosing the cheapest SMS verification service, consumers are now prioritizing not only affordability but also reliability and ease of use. They seek services that offer cost-effective solutions without compromising on security and delivery speed. In response to this shift in consumer preferences, SMS verification providers are adapting by offering more transparent pricing structures, improved user interfaces, and enhanced customer support.
Competition Among Service Providers
Navigating through the landscape of cheapest SMS verification services reveals a fierce competition among service providers vying for market dominance. In the realm of cheap SMS verification, companies are constantly striving to offer the most cost-effective solutions without compromising on reliability or security.
Providers are engaged in a race to innovate, offering features like real-time verification, global coverage, and seamless integration options. The competitive environment drives these service providers to enhance user experience, improve delivery speeds, and strengthen data protection measures.
As a consumer, you benefit from this intense competition by gaining access to a wide array of affordable SMS verification services, each trying to outdo the other in terms of pricing, quality, and efficiency. This competition ultimately results in better services and more competitive pricing for you, the end-user.
Future Innovations and Predictions
Embrace upcoming advancements in SMS verification technology to maximize efficiency and security for your service. One key innovation on the horizon is the use of virtual US mobile number for SMS verification. By utilizing virtual numbers, businesses can enhance the verification process by ensuring messages are sent and received securely. These virtual numbers can offer increased privacy and protection against fraud, making them a valuable tool for safeguarding sensitive information.
Additionally, virtual US mobile numbers can help streamline the verification process, providing a seamless experience for users while maintaining the highest standards of security. Incorporating this technology into your SMS verification services can lead to improved user trust and satisfaction, setting your service apart in an increasingly competitive market.
Conclusion
In conclusion, the future of the cheapest SMS verification services is bright and full of potential. With advancements in technology, changing consumer preferences, and increasing competition among service providers, the market is set to evolve rapidly.
By integrating biometric authentication, addressing regulatory compliance challenges, and embracing customization trends, businesses can stay ahead of the curve and meet the growing demand for affordable and secure SMS verification solutions. Get ready for an exciting journey ahead!